Goats Cheese, Feta and Pear Pizza

Now this may not sound like everyone’s idea of a pizza topping combination, but it is tasty!

You’ll need:

For the dough (unless you’re using a ready made base):

  • 300g strong white bread flour (plus extra for rolling and kneading)
  • 1/2tsp dried yeast
  • 2tbsp olive oil
  • 200ml warm water (about 25°C)
  • 1tsp salt
  • A pizza tray or stone (do not place the base directly onto an oven shelf). If you’re using a ready made base, follow the manufacturers instructions!

For the topping:

  • 1 tube tomato puree
  • Large clump of fresh basil
  • 20g hard cheese (Parmesan or cheddar)
  • 6 large mushrooms
  • 1 large red onion
  • 2 large tomatoes
  • 2 large dessert pears (or any pears that you have to hand)
  • Feta and Goats cheese
  • Pepper

To make the base put the flour, olive oil, salt and yeast in a mixing bowl and add about half of the water. Mix until the water is well combined, add the remaining water a little at a time until you have a slightly damp dough, but not one that is too sticky – you may not need all of the water. Spread a little more flour on a clean worktop or bread board, and gently knead the dough for about 5 minutes. Form the dough into a ball, and place in a greased (this helps to get it out later) bowl and cover with a clean tea towel. Place to one side at room temperature for about six hours. The dough should double in size.

IMG_20160521_174415281When you’re ready bring out the dough and shape into a roughly round shape, you can make it as thick or as thin as you prefer and to fit you pizza tray or stone. Place on a greased tray or prepared stone.

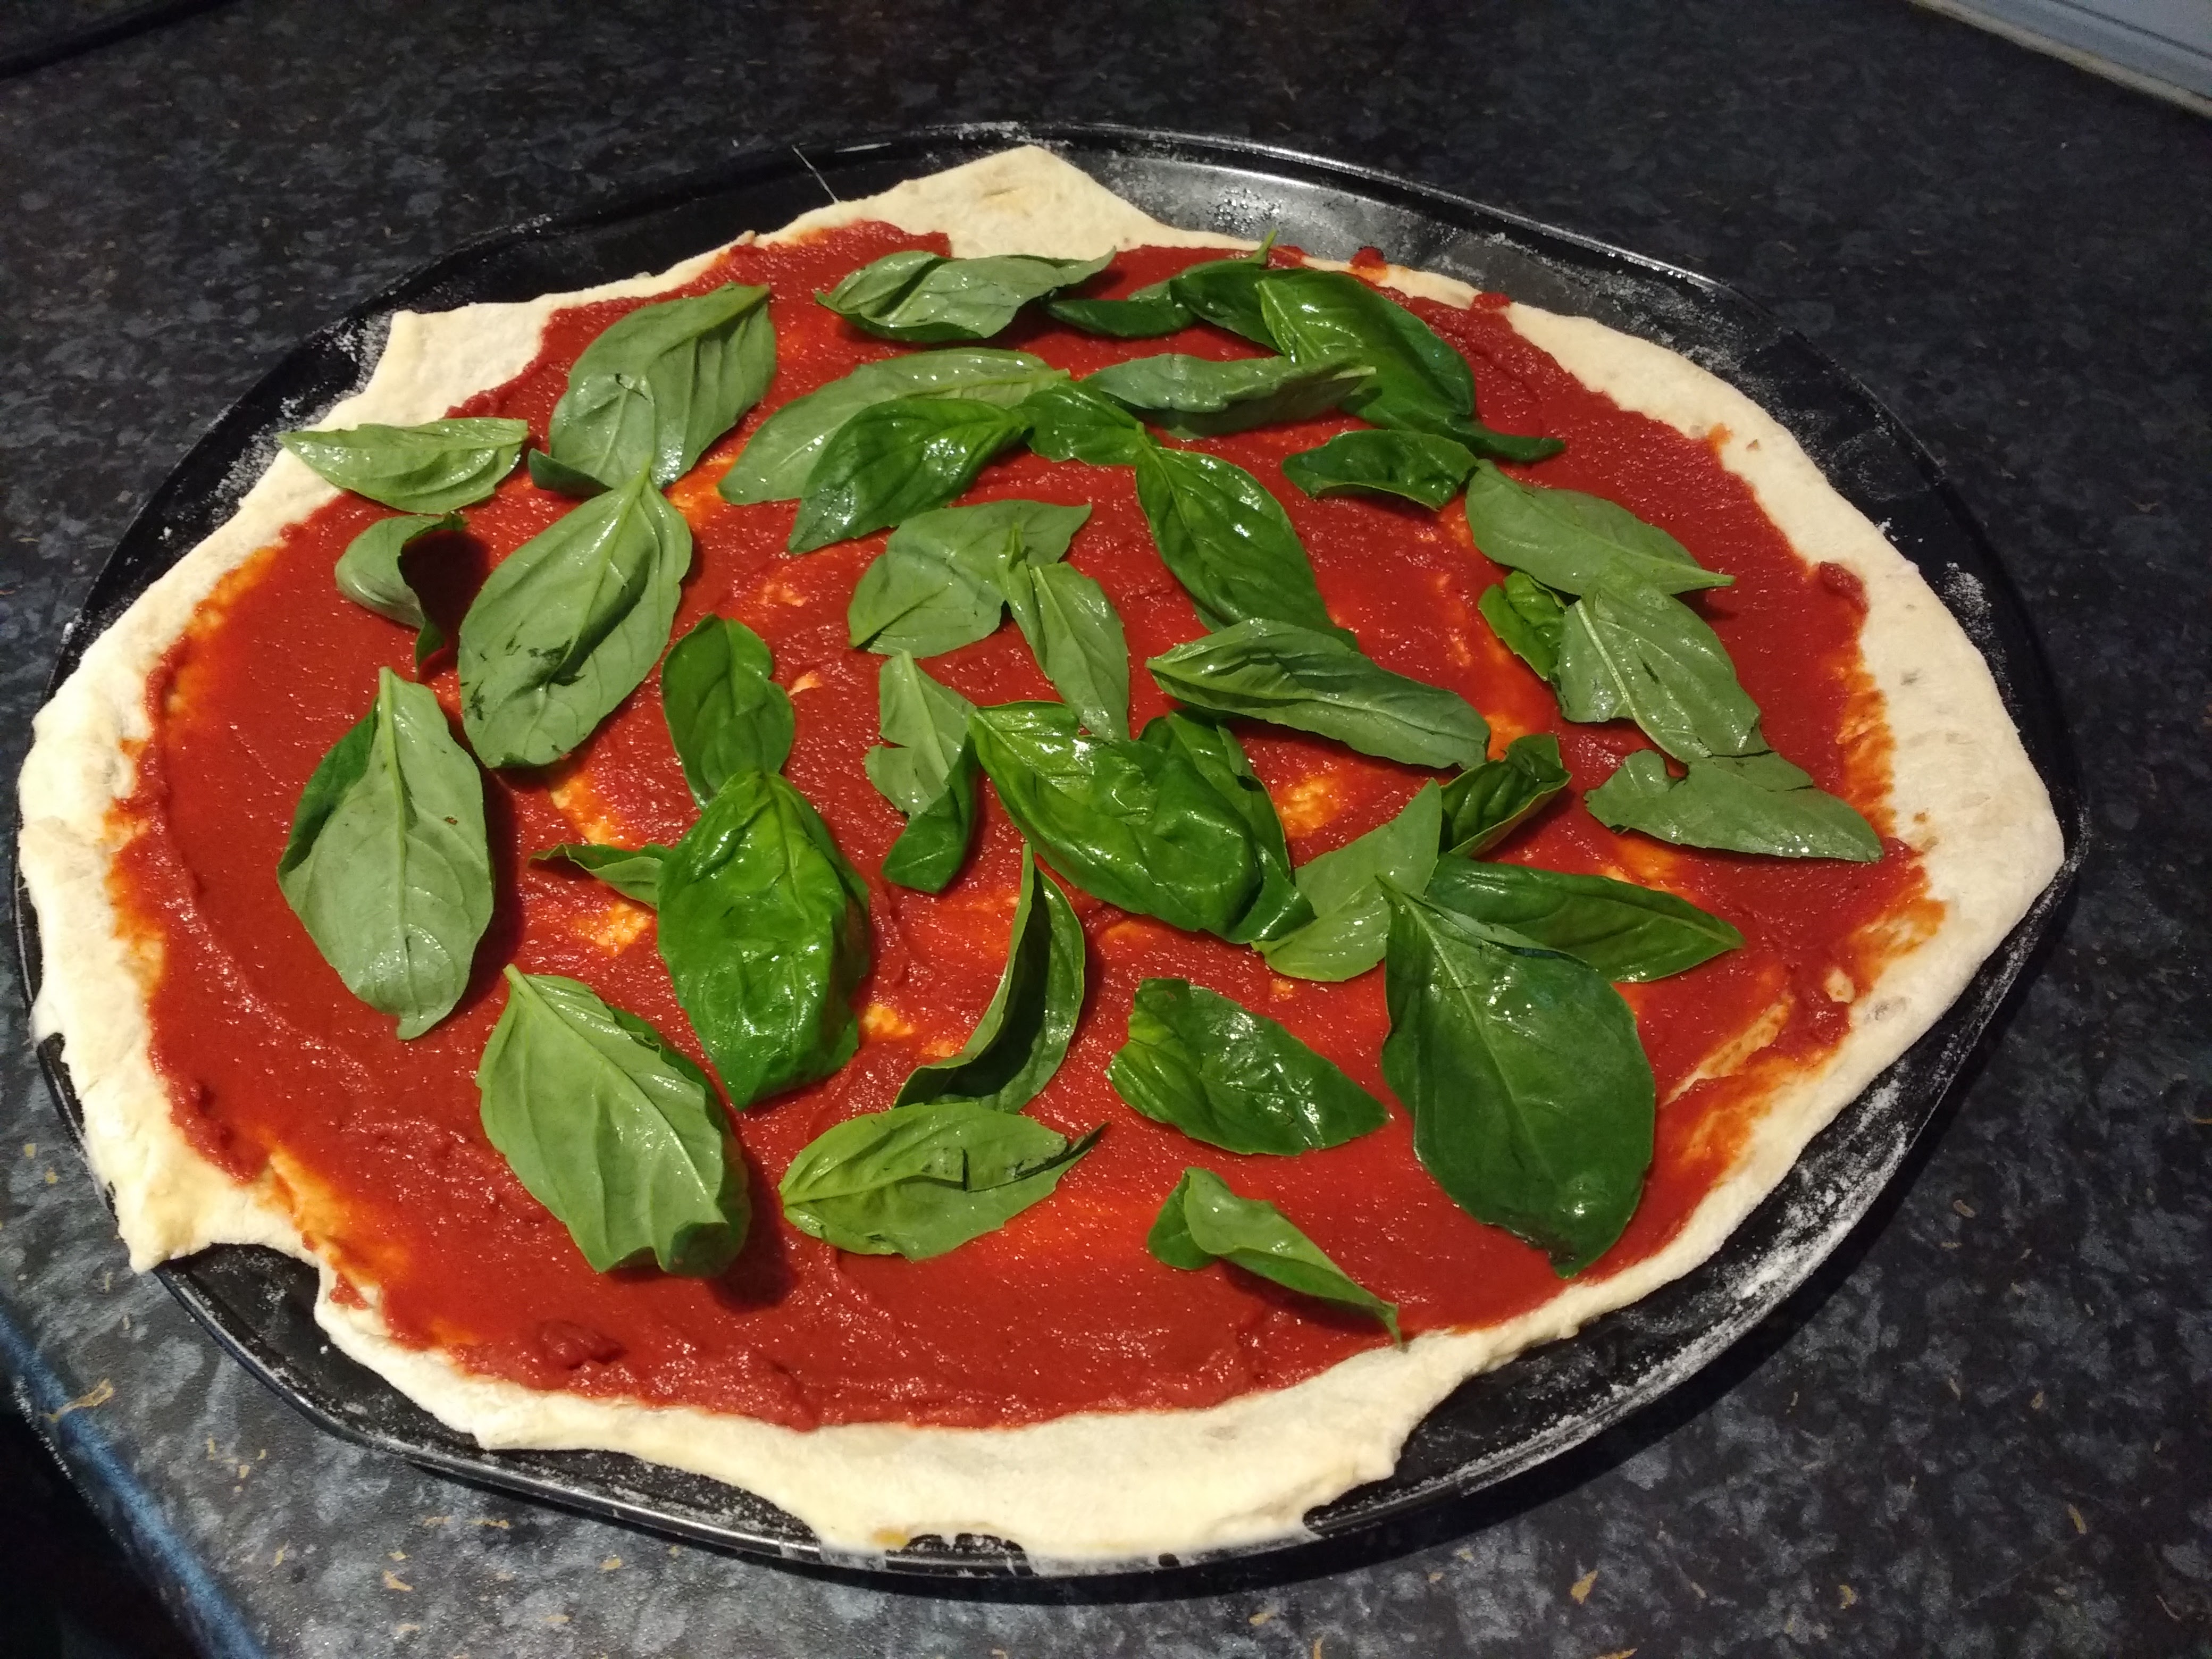
Cover the base with tomato puree, using the back of a table spoon to apply and even coating. Wash and dry the basil and spread the leaves evenly across the base (no need to chop), and a layer of finely grated hard cheese on top of the basil. Next slice your mushrooms and onions and add as another layer on top.

IMG_20160521_175137550
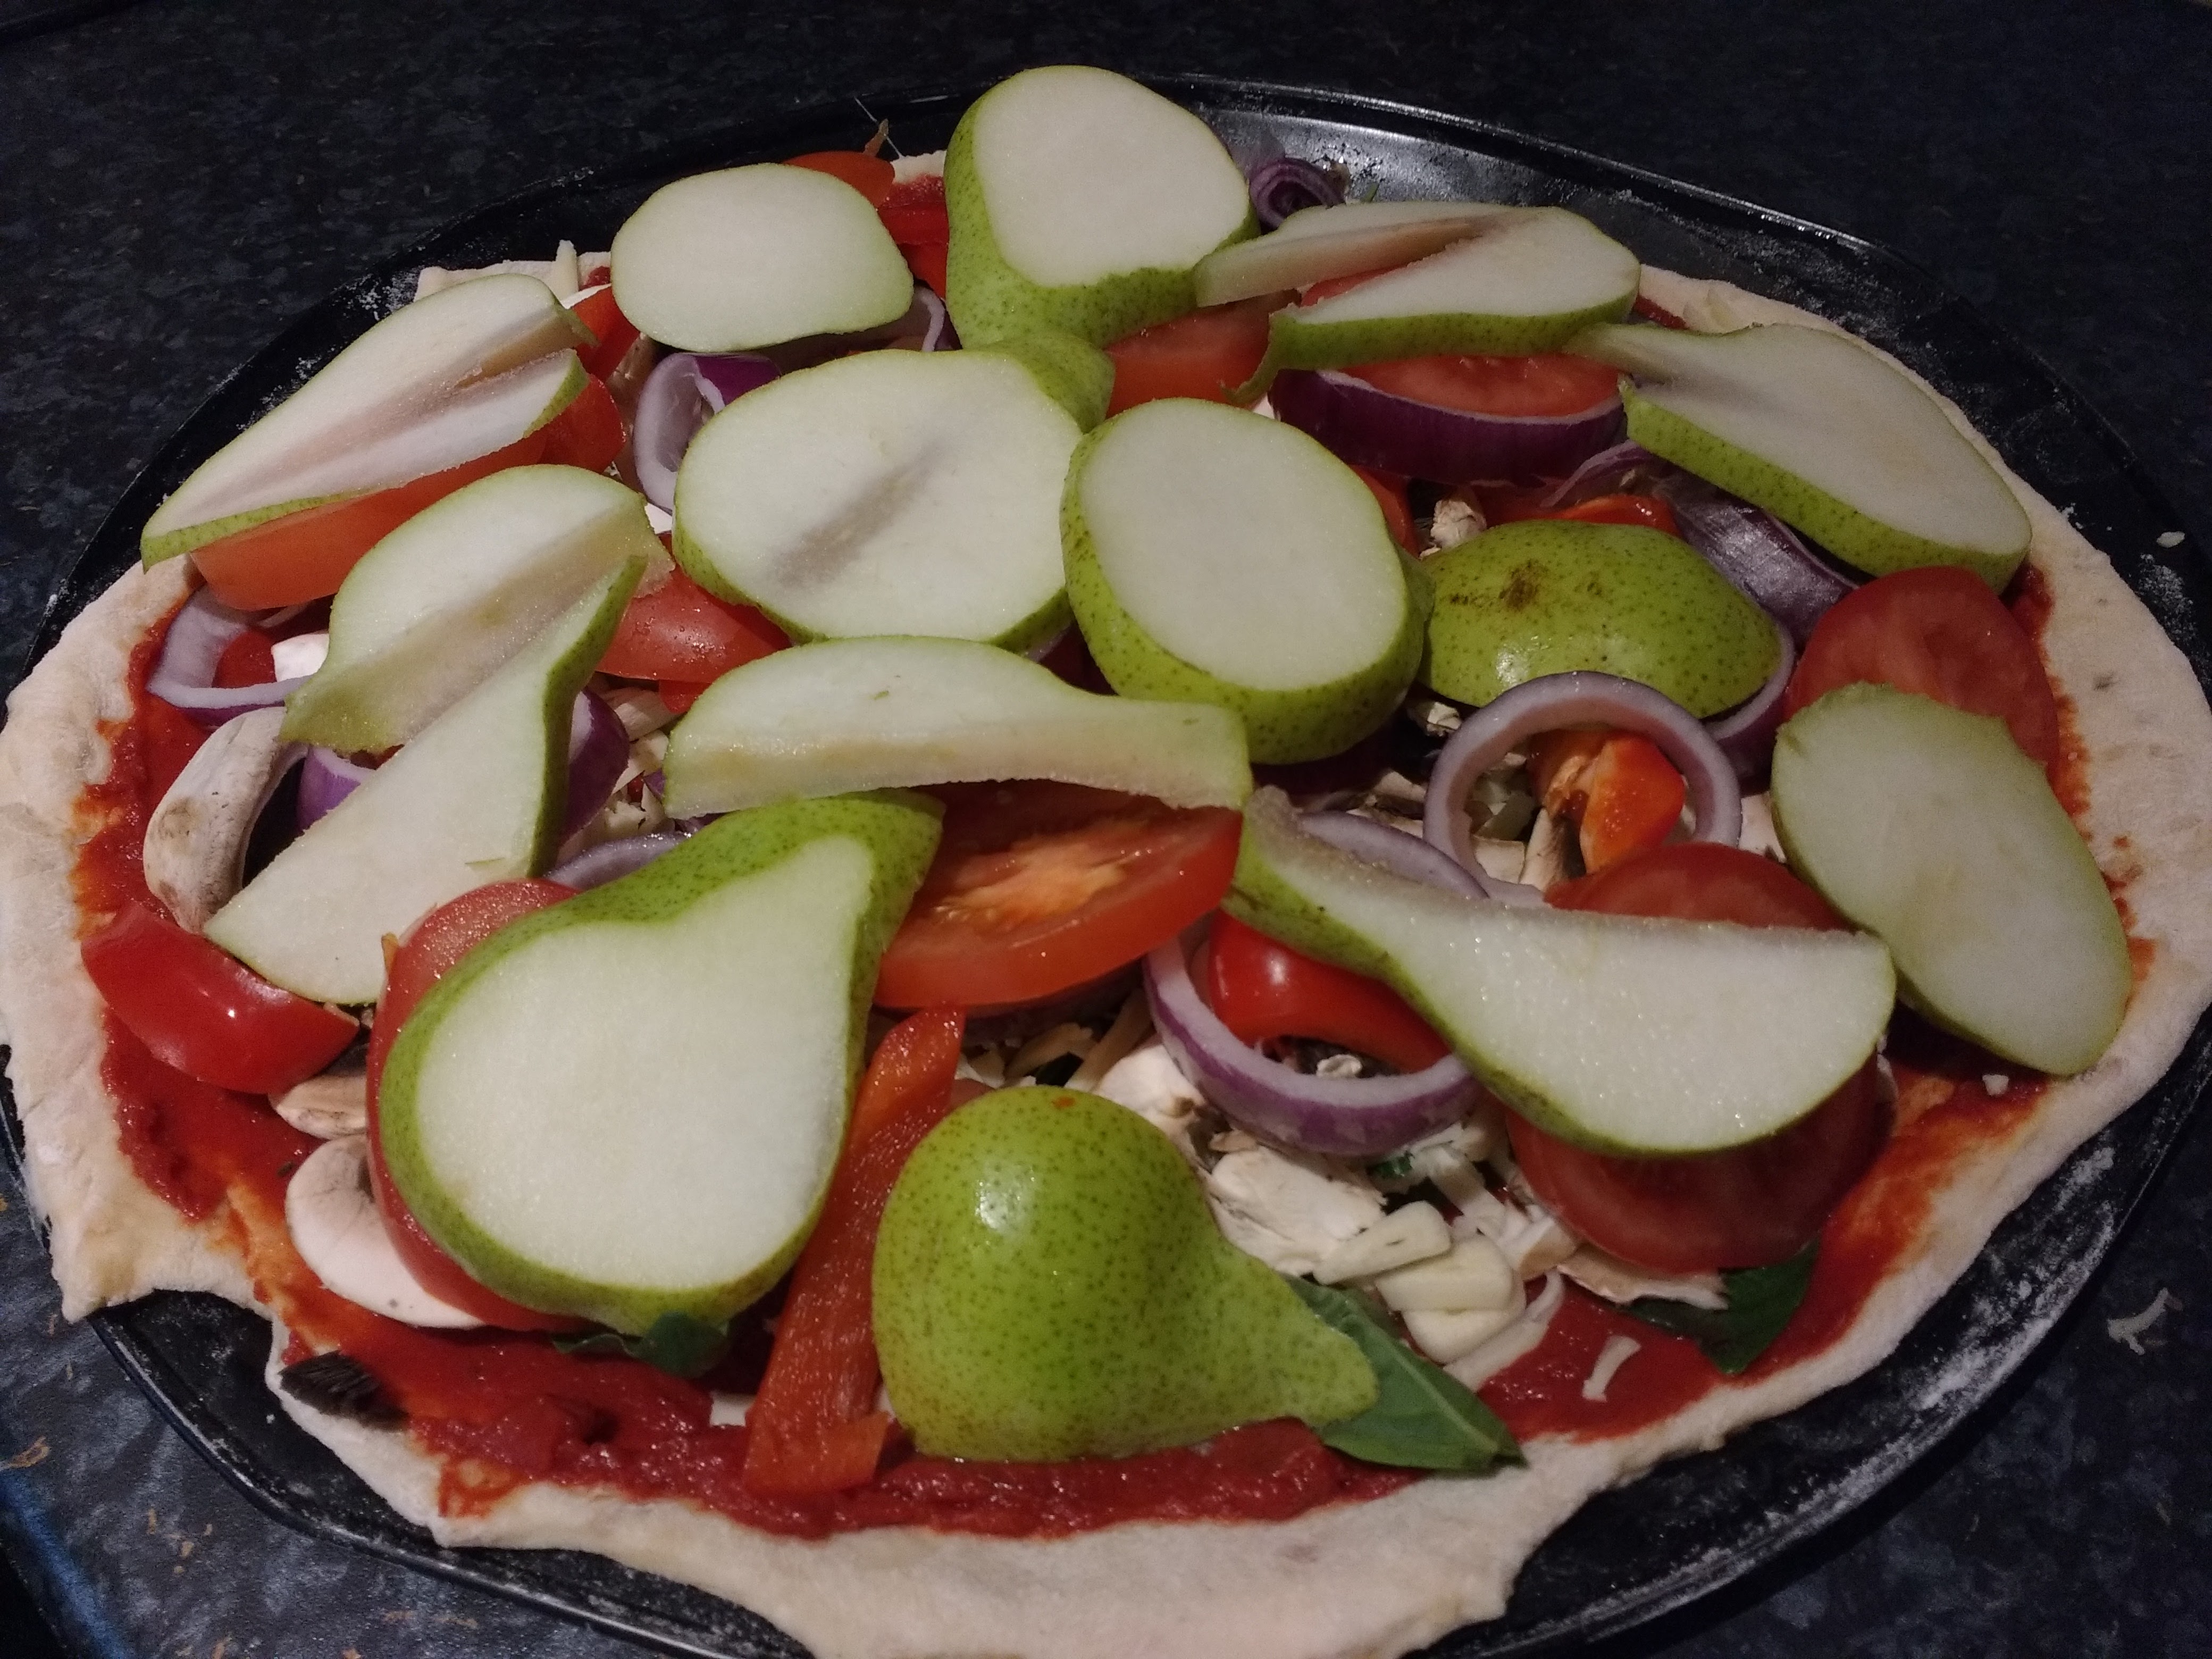
Core and slice the pears (if the skins are particularly thick, you can peel, but I prefer to leave them on), and add as another layer.

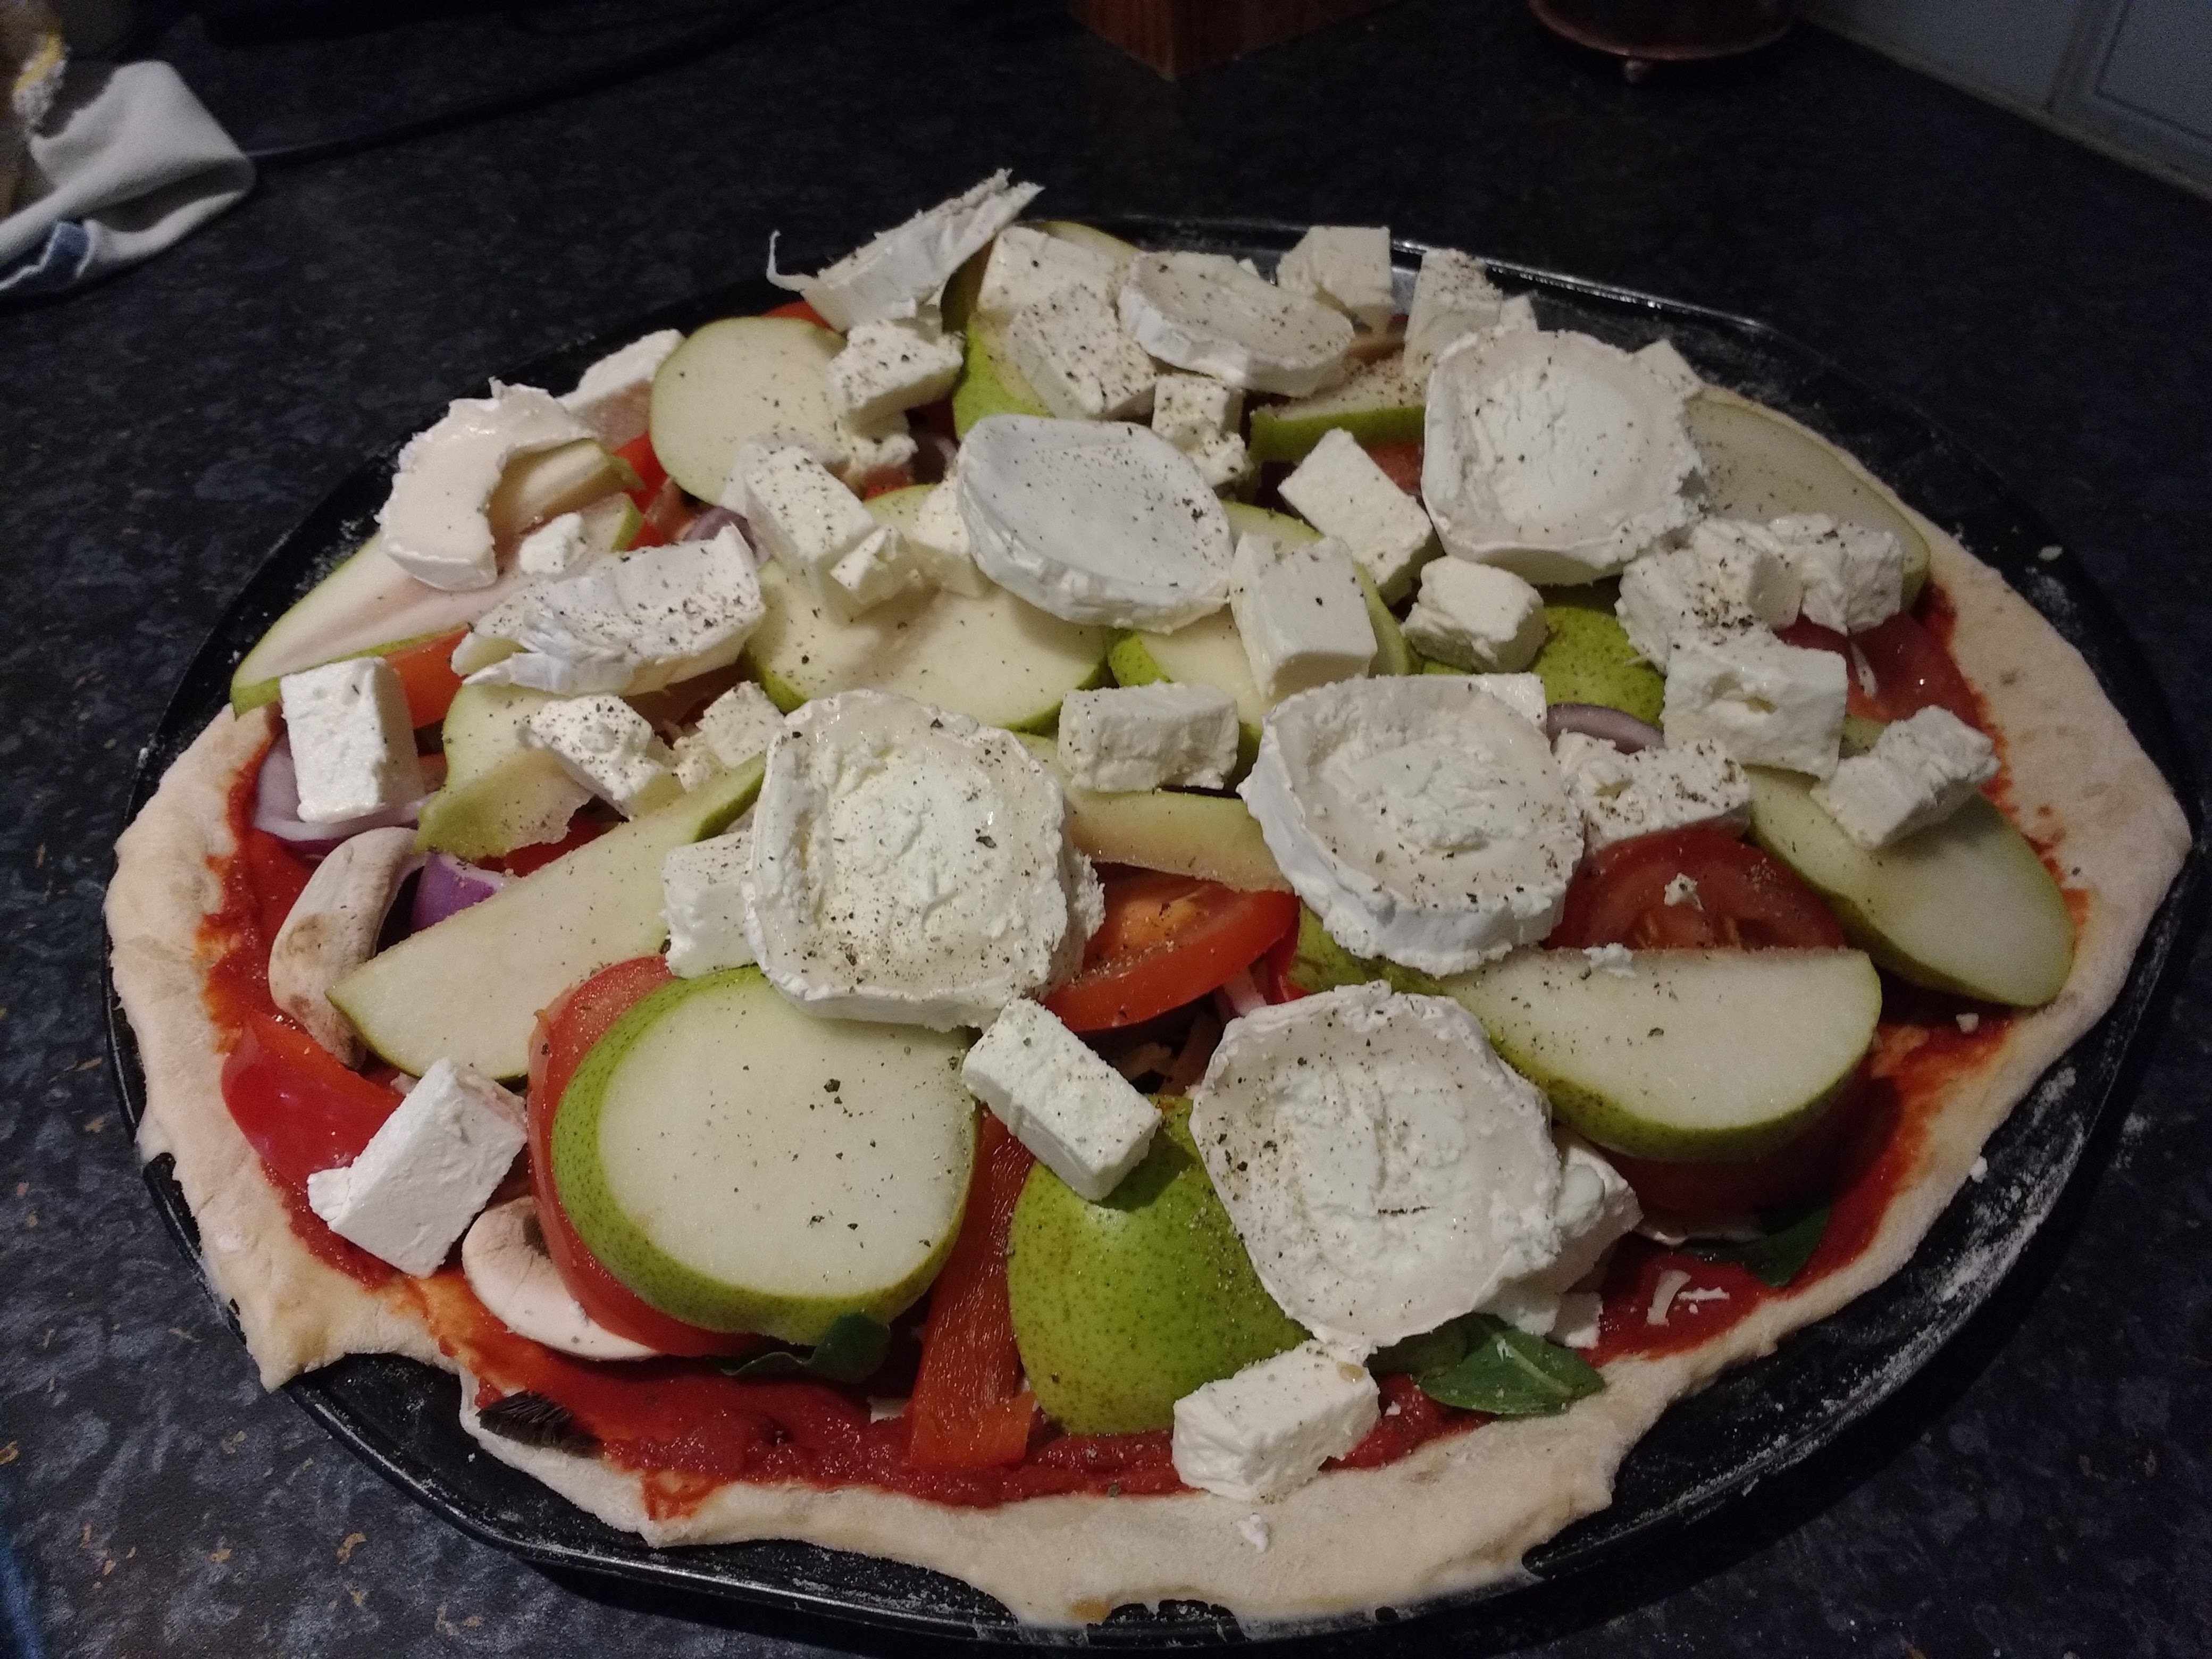
Finally slice the goats cheese and feta and add generously across the top of pear later.

Give the top a sprinkling of pepper (you’re unlikely to need salt, as there is a lot in the feta, but add to taste if you prefer).

Bake in a preheated oven (200°C) for 10 to 15 minutes until the base is cooked through, and the cheese has melted. Serve on it’s own or with a light salad.

IMG_20160521_175451766


Ready, Steady, Not Quite Go! & A Rhubarb Recipe

Water Leak - A Work in Progress
Water Leak – A Work in Progress

Well, it’s been a very busy week, and a little unexpectedly so. It was good to get to the weekend though, and to get down to the allotment. If you read my post about the water problems at the site, I’m pleased to report that they have been resolved it seems. The leak has been fixed, and my prayers for rain have been answered, it even managed to rain on the workman when they were trying to sort the problem out.

We’ve had a week of rain at night, and into the morning and then from about mid-morning onwards it’s been bright and sunny, and that pretty much sums up every day this week, until the weekend arrived at it was sunny from the get go!

Plan B for Water
Plan B for Water

My alternative plan for getting water to the allotment arrived in the post during the week, and although it wasn’t technically needed, I still wanted to try it out this morning. It’s an H2GO bag, [Amazon Link – other suppliers do exist] that sits in a wheelbarrow and holds about 50 litres of water. I was a bit skeptical about whether it would actually work, but it does, and I’m really impressed. You need something large like a big bucket to tip the water into, so that you can then scoop it up into a watering can and 50 litres weighs quite a bit so if you’re a long way from where you want to get the water too, you might want to think about not filling it completely full. If I get a chance I’ll try and do a quick video, so you can see it in action.

Off To The Plot
Off To The Plot

When I went down to the plot this morning it was with the main intention of getting some more plants into the ground. Things have been getting a little tight for space in the potting shed, and it was time for some to move out onto the allotment. I had Cavalo Nero, Sweetcorn and some Cucumbers to go down, and although it’s potentially too early for the latter two I had a cunning plan to protect them from the nighttime temperatures which are still dropping down into the mid single figures.

Cavalo Nero In. Brassica Cage Full!

The Cavalo Nero plants went into the brassica cage alongside the cabbages, cauliflowers and broccoli. It’s now as full as it’s going to be this year. There are some more brassicas to go, but there’ll have to go into another part of the plot

Sweetcorn In Their New Home (With Net Curtains!)

The sweetcorn have gone in as well, and I’ve built a little windbreak / cage for them too. This one made from enviromesh and some old net curtains (because I didn’t have a big enough piece of enviromesh). The cucumbers are just alongside, and have a fleece “dome” over the top of them. I hope both of these slightly Heath Robinson constructions will help the plants establish. The forecast for the week ahead looks good, and nighttime temperatures aren’t too low, so they may be okay. I’ll keep an eye on them anyway, because they’ll need watering in.

And finally I had a great crop of rhubarb to harvest. I love rhubarb and there are many things that you can do with it, including jams, wine and other nice things. However I think that you can’t beat some nice stewed rhubarb. Now I know that sounds a bit like school dinners, but take my word for it and give it a try. Here’s how I go about preparing it:

  1. Take your rhubarb stalks and remove the leaves (you can’t eat the leaves, as they’re toxic, so throw them on the compost heap or in the bin). Clean the stalks and chop into pieces about 2.5cm long.
  2. Place these in an oven proof glass dish, add a small amount of water (you don’t want to cover them, so just about halfway to the top of the rhubarb).
  3. Add ground cinnamon and brown sugar to taste (about a level teaspoon of cinnamon and a level tablespoon of brown sugar to six stalks of rhubarb, add more sugar if you have a sweet tooth).
  4. Add a generous handful of sultanas.
  5. 2016-05-14 15.43.58

      The Rhubarb Mix – Ready To Go Into The Oven
  6. Cover & put in the oven at a 140ºC / Gas Mark 3, for about 20 minutes. At this point, remove and stir with a fork to break-up (shred) the rhubarb.
  7. Return to the oven for about another 10 minutes, and then repeat the shredding process until the rhubarb is soft and stringy.
  8. Serve straight from the oven (it will be very hot!) with a big scoop of vanilla ice cream or allow to cool and serve. Works great on porridge or muesli for breakfast!
The End Result - Great With Vanilla Ice Cream
The End Result –
Great With Vanilla Ice Cream


Quick Links 1st December 2015

Each week I’ll try and post quick links to things that I’ve seen, read or just sparked my interest in the previous week. Mostly gardening, cooking and environmental stuff but not always.

Little Sister: the third Pieter Vos book [davidhewson.com]

Festive Gingerbread Stars [Hole Food Family Blog]

The Dog In The Clouds [The Dog In The Clouds Blog]

When I’m sixty-four: world’s oldest tracked bird returns to refuge with mate [The Guardian]

The Week In Wildlife In Pictures [The Guardian]

The Atlas Snow Arch Greenhouse Build Part 6 Covering the Greenhouse With Greenhouse Film [YouTube]

Quick Links 24th November 2015

Each week I’ll try and post quick links to things that I’ve seen, read or just sparked my interest in the previous week. Mostly gardening, cooking and environmental stuff but not always.

 Cats Scared by Cucumbers [Huffington Post]

The Week in Wildlife – in pictures [The Guardian]

Gennaro Contaldo | Braised Rabbit & Pumpkin Stew [YouTube]

The Atlas Snow Arch Greenhouse Build Part 5 Installing doors and covering the end walls [YouTube]

How I Built Our DIY Hoop House (Greenhouse), pt. 2: Door & Plastic Cover [YouTube]

Quick Links 17th November 2015

Each week I’ll try and post quick links to things that I’ve seen, read or just sparked my interest in the previous week. Mostly gardening, cooking and environmental stuff but not always.

Britain loses top energy rating [Guardian]

World’s Climate About to Enter Uncharted Territory after it passes 1C of warming [Guardian]

Will Reintroduced Lynx Hunt Britains Sheep? [Guardian]

The Week In Wildlife In Pictures [Guardian]

Harissa Roast Chicken & Warming Bone Broth and Tomato & Basil Risotto meets Harissa Chicken Bone Broth [Hole Food Family Blog]


Hot Pasta Ragu Sauce

This is a hot Ragu sauce for pasta, that can be made in about 45 minutes, and serves up to 4 people depending on appetite. You’ll need:

  • 1 large white onion
  • 4 cloves of garlic
  • 3 or 4 medium sized mushrooms
  • 1 Jalapeno Pepper
  • 10 large basil leaves
  • 2 tablespoons of olive oil
  • Salt & Pepper for seasoning
  • 500g extra lean minced beef (approx weight)
  • 1 tin of plum tomatoes or chopped tomatoes
  • 1 glass of red wine (optional)
  • 2 beef oxo cubes (other stock cubes are available)
  • 80 – 100 grams / per person dried pasta shapes
  • Grated parmesan or other cheese for garnish

Method:

  1.  Peel and finely chop the onion, and garlic and chop the 2015-11-11 16.52.50mushrooms and pepper (this is a hot sauce so don’t deseed the pepper, but if you prefer a milder flavour you will want to remove the seeds).
  2. Add the oil to a suitable sized pan over a medium heat, when the oil is warmed through add the onion, garlic and mushrooms, and sweat for about 5 minutes.
  3. Add the minced beef and cook until well browned. Continue to cook the onion, garlic, mushroom and beef mixture for a further 5 minutes.
  4. Add the chilli pepper and mix the combine throughout the mixture.
  5. Add the tomatoes. If you’re using plum tomatoes, roughly
    chop-up in the pan with a knife or blade of a spoon. Add approximately 1/2 a tin of water to the mixture, depending on how much liquid has come out of the beef and tomatoes.2015-11-11 17.16.12
  6. Roughly chop the basil leaves and add about half to the
    mixture, along with the stock cubes, and salt and pepper to taste (remember there will be some salt already in the stock cubes, so don’t over do the seasoning).
  7. Make sure the mixture is well combined and continue to simmer on a low heat for 25 minutes, stirring occasionally. If there is too much liquid present remove the saucepan lid to aid evaporation.
  8. In another pan bring enough water to cook your pasta to the boil, add a little olive oil to the water to prevent the pasta sticking.
  9. Once the water is boiling add the pasta and cook according to the packet instructions.
  10. Add the remaining basil to the meat sauce just before serving, and remove from the heat.
  11. Drain the pasta and serve with the ragu sauce, garnish with the grated cheese.

Quick Links 11th November 2015

Each week I’ll try and post quick links to things that I’ve seen, read or just sparked my interest in the previous week. Mostly gardening, cooking and environmental stuff but not always.

Hugh’s War on Waste – Hugh Fearnley-Whittingstall look at just how much we waste as a society. Quite shocking statistics, and facts. BBC TV programme (programme video only available in the UK)

Gennaro Contaldo 90 Second Pesto Sauce (YouTube)

The Atlas Snow Arch Greenhouse Build Part 4 Framing the Steel End Walls (YouTube)

How I Built Our Hoop House (Greenhouse), pt. 1: Framing (YouTube)

Energy minister expects UK to miss renewables target, leaked letter shows (Guardian)

Earth’s climate entering new ‘permanent reality’ as CO2 hits new high (Guardian)

The Week In Wildlife – In Pictures (Guardian)