
Tag: cavalo nero
Ready, Steady, Not Quite Go! & A Rhubarb Recipe

Well, it’s been a very busy week, and a little unexpectedly so. It was good to get to the weekend though, and to get down to the allotment. If you read my post about the water problems at the site, I’m pleased to report that they have been resolved it seems. The leak has been fixed, and my prayers for rain have been answered, it even managed to rain on the workman when they were trying to sort the problem out.
We’ve had a week of rain at night, and into the morning and then from about mid-morning onwards it’s been bright and sunny, and that pretty much sums up every day this week, until the weekend arrived at it was sunny from the get go!

My alternative plan for getting water to the allotment arrived in the post during the week, and although it wasn’t technically needed, I still wanted to try it out this morning. It’s an H2GO bag, [Amazon Link – other suppliers do exist] that sits in a wheelbarrow and holds about 50 litres of water. I was a bit skeptical about whether it would actually work, but it does, and I’m really impressed. You need something large like a big bucket to tip the water into, so that you can then scoop it up into a watering can and 50 litres weighs quite a bit so if you’re a long way from where you want to get the water too, you might want to think about not filling it completely full. If I get a chance I’ll try and do a quick video, so you can see it in action.
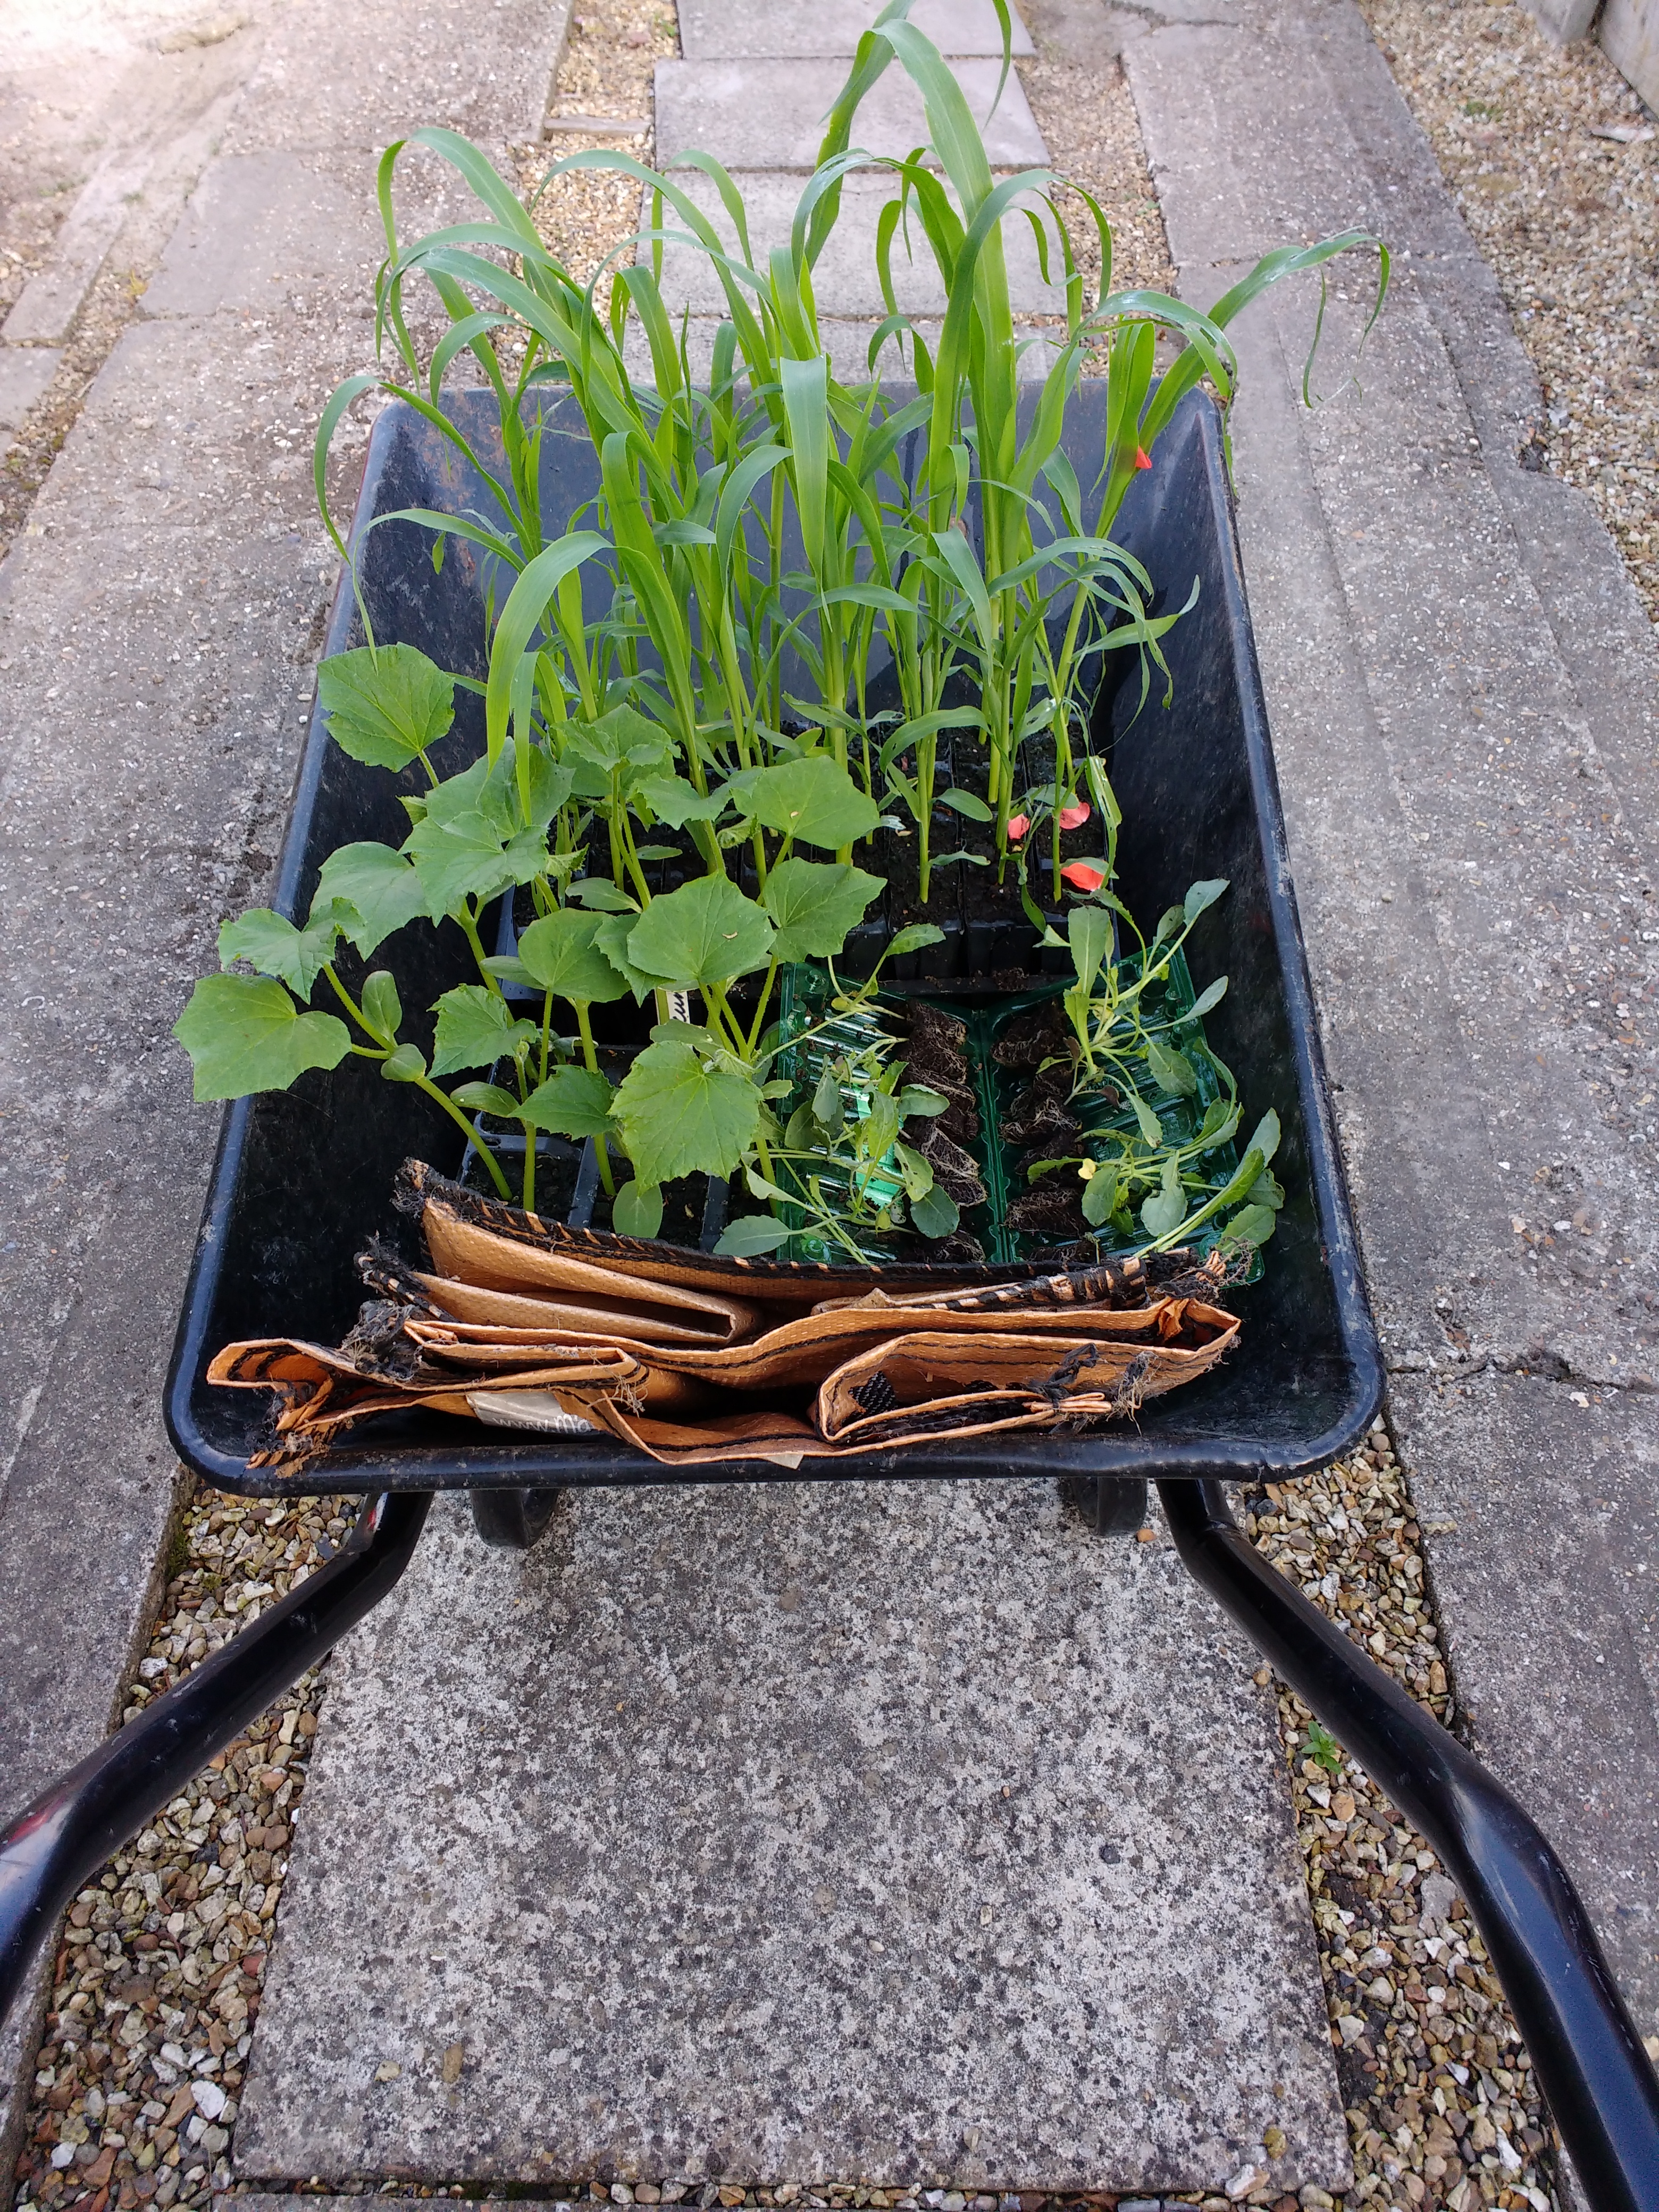
When I went down to the plot this morning it was with the main intention of getting some more plants into the ground. Things have been getting a little tight for space in the potting shed, and it was time for some to move out onto the allotment. I had Cavalo Nero, Sweetcorn and some Cucumbers to go down, and although it’s potentially too early for the latter two I had a cunning plan to protect them from the nighttime temperatures which are still dropping down into the mid single figures.
The Cavalo Nero plants went into the brassica cage alongside the cabbages, cauliflowers and broccoli. It’s now as full as it’s going to be this year. There are some more brassicas to go, but there’ll have to go into another part of the plot

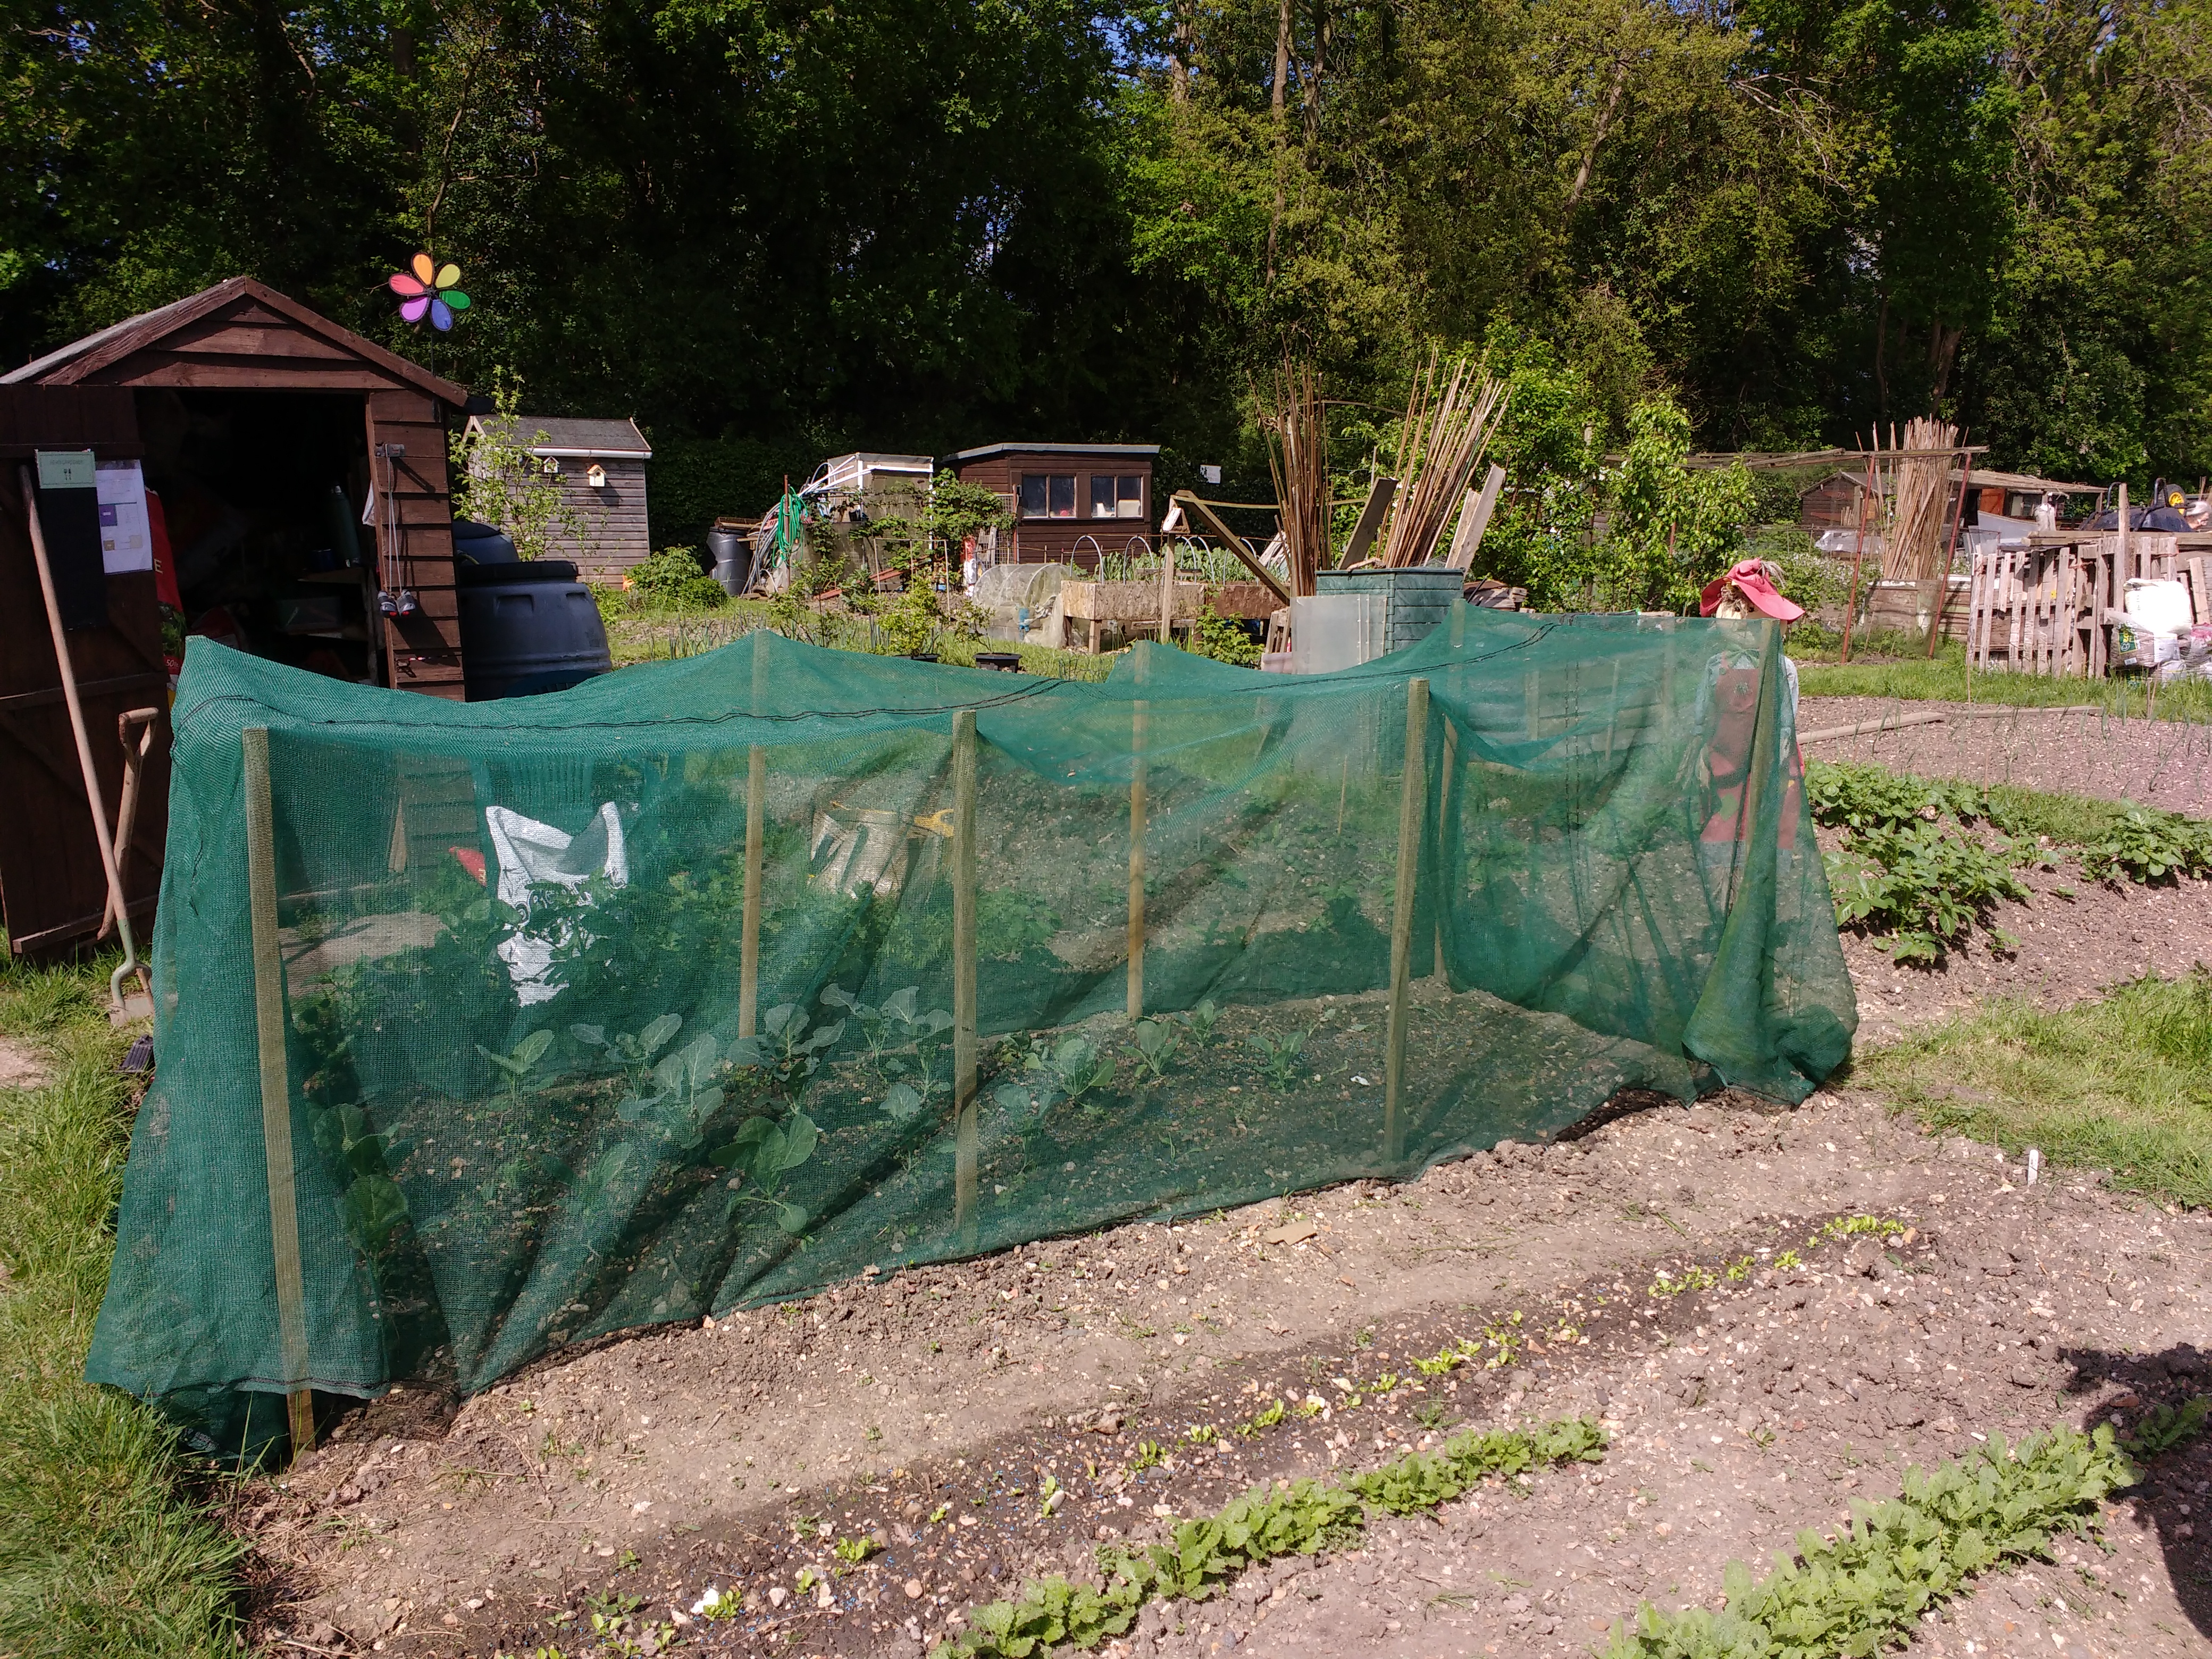
The sweetcorn have gone in as well, and I’ve built a little windbreak / cage for them too. This one made from enviromesh and some old net curtains (because I didn’t have a big enough piece of enviromesh). The cucumbers are just alongside, and have a fleece “dome” over the top of them. I hope both of these slightly Heath Robinson constructions will help the plants establish. The forecast for the week ahead looks good, and nighttime temperatures aren’t too low, so they may be okay. I’ll keep an eye on them anyway, because they’ll need watering in.
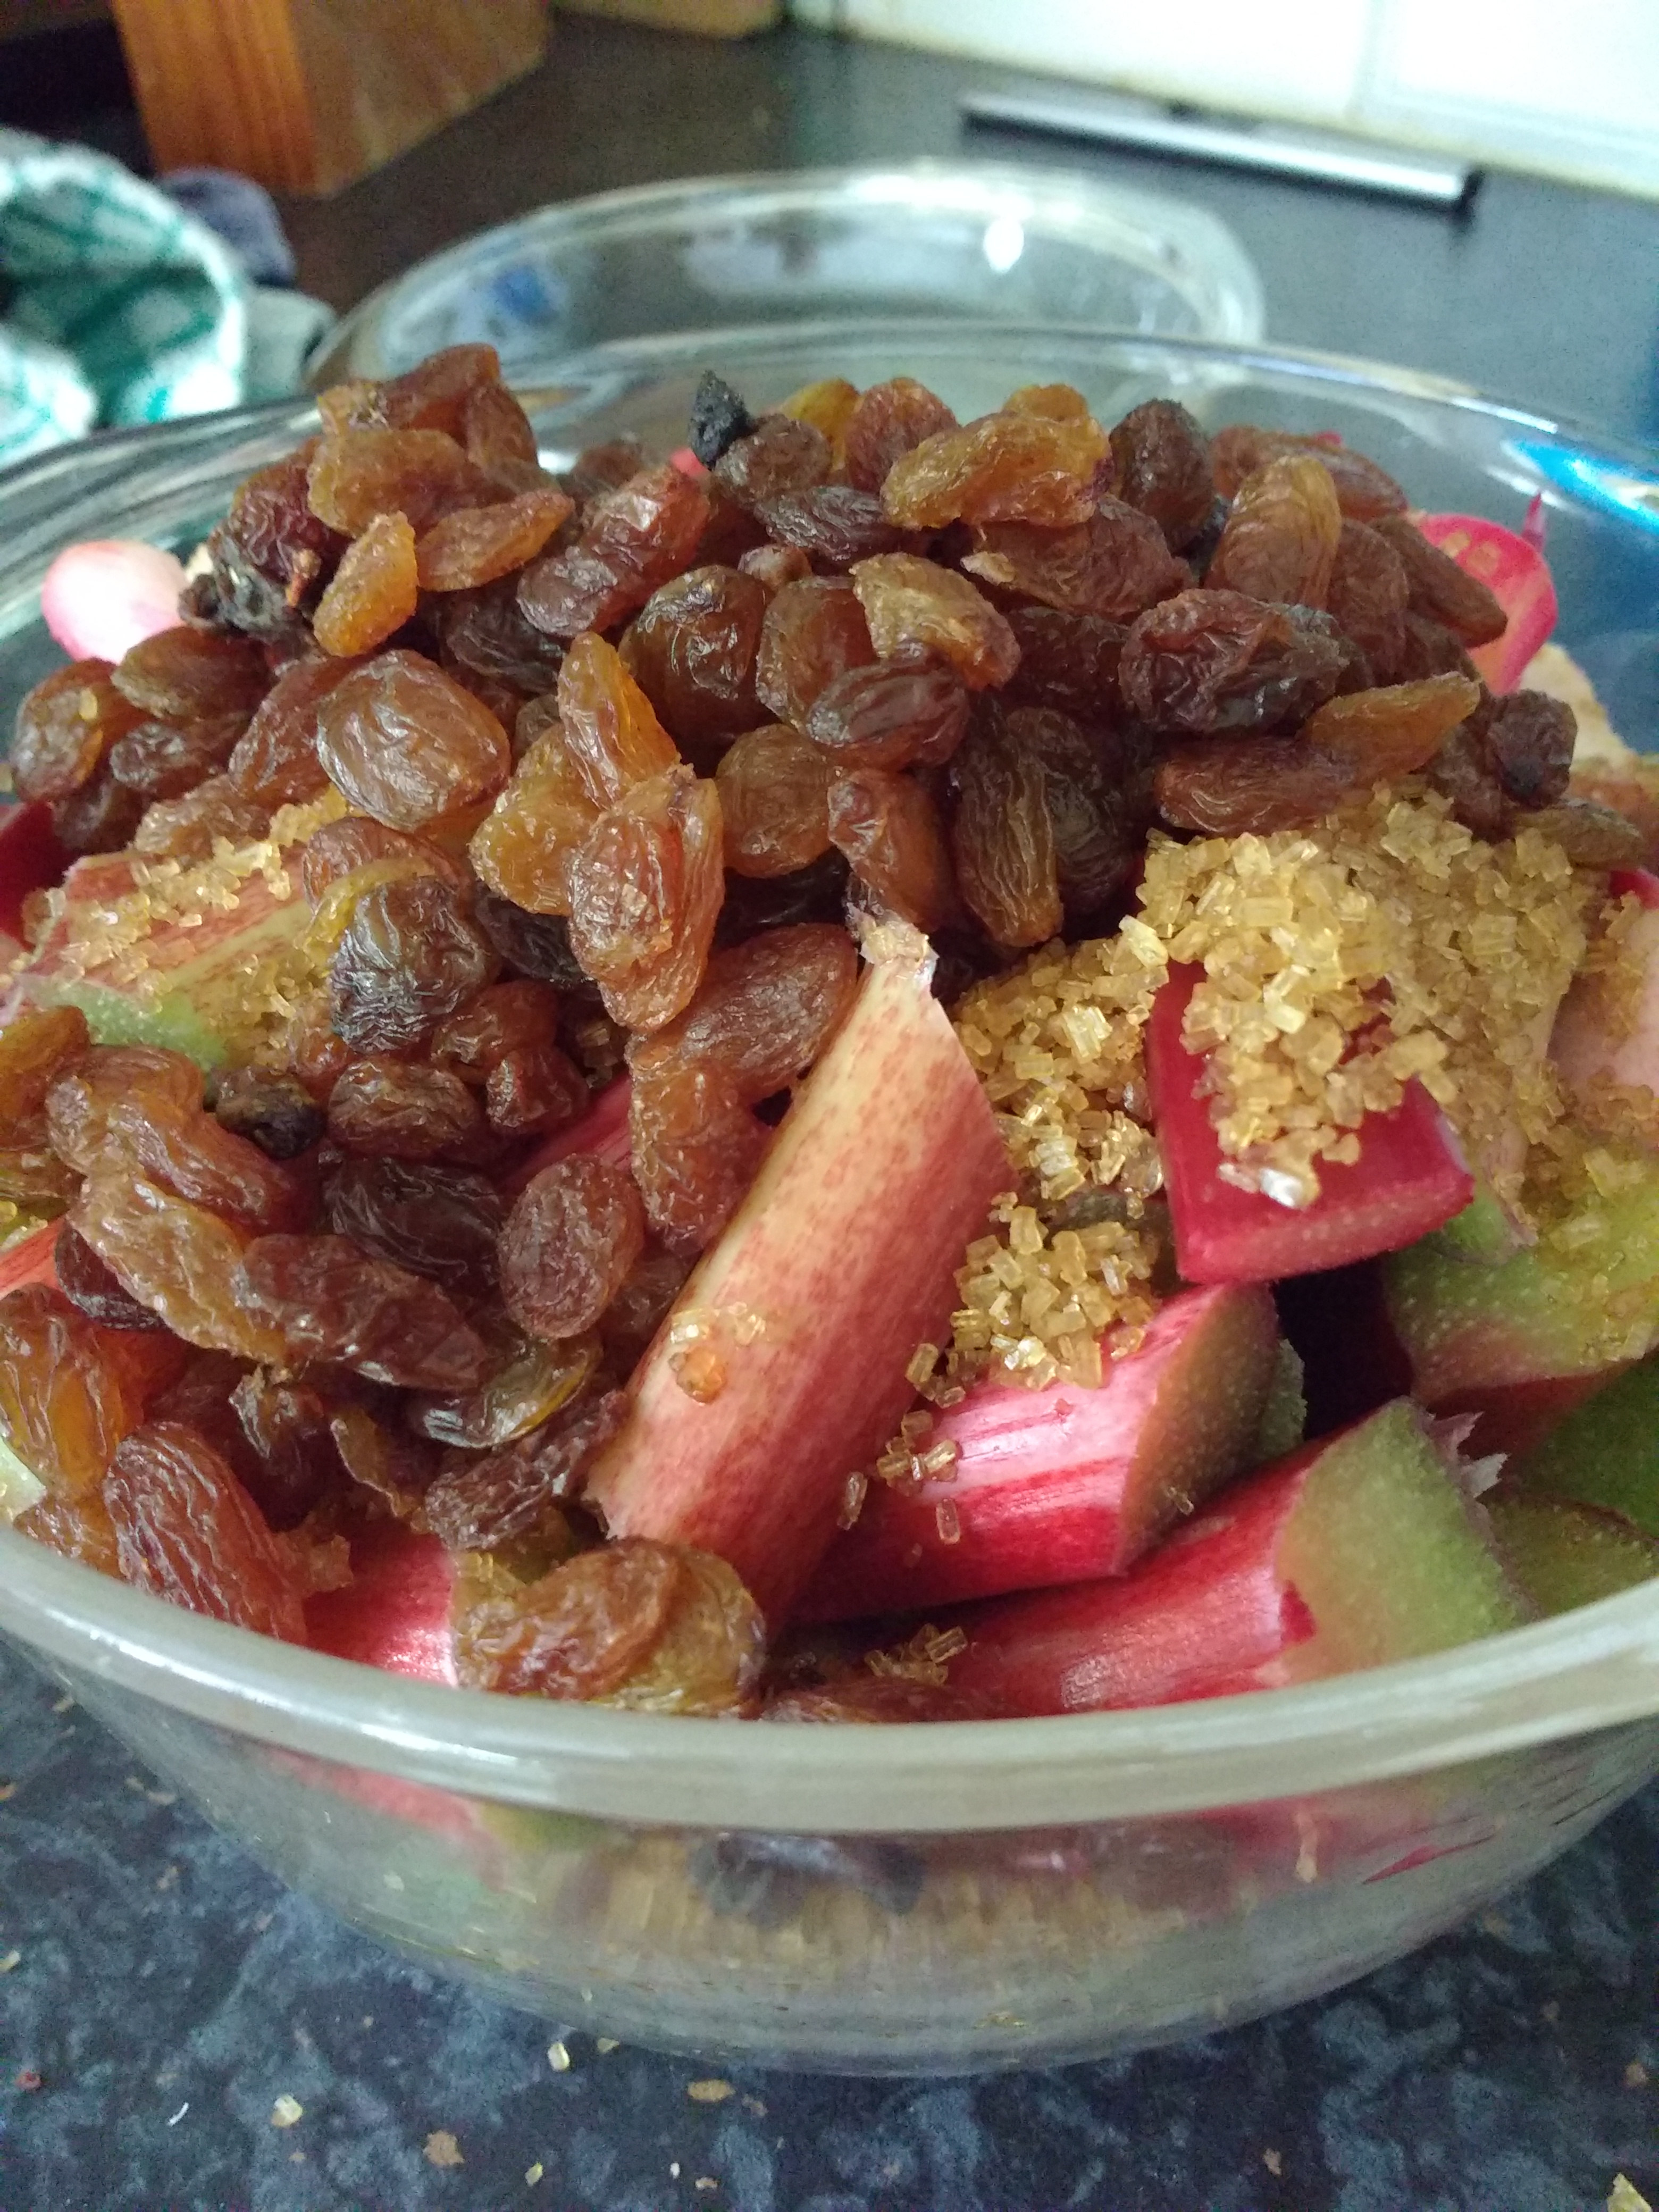
And finally I had a great crop of rhubarb to harvest. I love rhubarb and there are many things that you can do with it, including jams, wine and other nice things. However I think that you can’t beat some nice stewed rhubarb. Now I know that sounds a bit like school dinners, but take my word for it and give it a try. Here’s how I go about preparing it:
- Take your rhubarb stalks and remove the leaves (you can’t eat the leaves, as they’re toxic, so throw them on the compost heap or in the bin). Clean the stalks and chop into pieces about 2.5cm long.
- Place these in an oven proof glass dish, add a small amount of water (you don’t want to cover them, so just about halfway to the top of the rhubarb).
- Add ground cinnamon and brown sugar to taste (about a level teaspoon of cinnamon and a level tablespoon of brown sugar to six stalks of rhubarb, add more sugar if you have a sweet tooth).
- Add a generous handful of sultanas.
-

- The Rhubarb Mix – Ready To Go Into The Oven
- Cover & put in the oven at a 140ºC / Gas Mark 3, for about 20 minutes. At this point, remove and stir with a fork to break-up (shred) the rhubarb.
- Return to the oven for about another 10 minutes, and then repeat the shredding process until the rhubarb is soft and stringy.
- Serve straight from the oven (it will be very hot!) with a big scoop of vanilla ice cream or allow to cool and serve. Works great on porridge or muesli for breakfast!

Great With Vanilla Ice Cream
